I told you I'd be back! Ready to finish? Only a few steps to go and the table will be done!
Except for moving her and you'll have to find your own crew to do that! So have you picked out your stain? I decided on Minwax Classic Gray so it will go with most any color cushions or chairs. And I love the classic gray and white combination!
Except for moving her and you'll have to find your own crew to do that! So have you picked out your stain? I decided on Minwax Classic Gray so it will go with most any color cushions or chairs. And I love the classic gray and white combination!
 |
| Minwax Classic Gray |
Then all pieces were laid flat to dry overnight. Since we were expecting some rain, I covered with an old shower curtain and secured with rocks.
The next morning I took off the shower curtain before work and allowed all the pieces to continue drying.
 |
| Numbered Legs |
The last step is to attach her legs! See the numbers?
And more numbers! And they match! I am a happy girl!
 |
| Numbered Pallet Underneath |
So if you've numbered all of them you should have 1 through 8 to match up to the base. Match numbers, line up holes and pound one of the lag bolts through from the outside of the apron board. Once you've got both legs to one corner secured with the lag bolts you can add a washer & nut from the underside to secure. Do all 4 corners. Sorry I don't have pics for this.
I didn't over tighten as I do want to get them loose in the Fall to turn the legs up for storage, but tight enough that they don't wiggle! Trust me (
 |
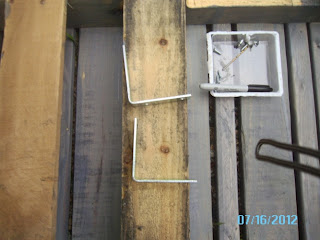
| Angle Brackets |
These guys are going to make sure the legs won't move apart.
You only need 4 and each will take 4 screws that come with the pack. About 3 inches above the bottom of the leg, line an angle bracket up evenly and mark the holes ... and then we all said, "Pre-drill!"
It's worth it to mark and pre-drill all four sets of legs before securing with screws...unless you have a power screwdriver
 |
| Secured Angle Bracket |
Once you've secured an angle bracket on each leg, guess what?
You're done.
Just flip her down onto her legs and admire your handiness!
 |
| Very Classic Lady! |
Now about those extra pallets I have? It turns out they're not so "extra"! Look at the next project! Er...uhm...the next one after the bench and the bedroom floor and the storm door and the front door and the Adirondack chairs... Oh, and if you want a pallet, I can still get one for you!
 |
| Pallet Compost Bin |
Now won't the gardens love this next Spring!!!

No comments:
Post a Comment